A Guide to Rendering Glass in Arnold for Maya
Glass is one of those tricky things when it comes to rendering. You want it to be realistic but you also want it to be visible in your render. It is an object that can make or break the realism of the scene as well. To help with any of your struggles, here is an in depth guide to all the important factors that go into making a glass render look believable.
Using Presets
Arnold in Maya includes a glass and frosted glass preset in their Ai Standard Surface material. Start with the presets they give you! But also… don’t stop there!! Presets are not perfect, but they are a really good starting place. They get you the first 50% there much faster. People spend a long time developing these presets for users to use…so use them! I love presets as well for when I’m testing something for a while and I stray too far from what I need. I can always go back and reference the presets for what values they use, and compare to my values to see how different they are. Use your resources!


HDRIs and Glass
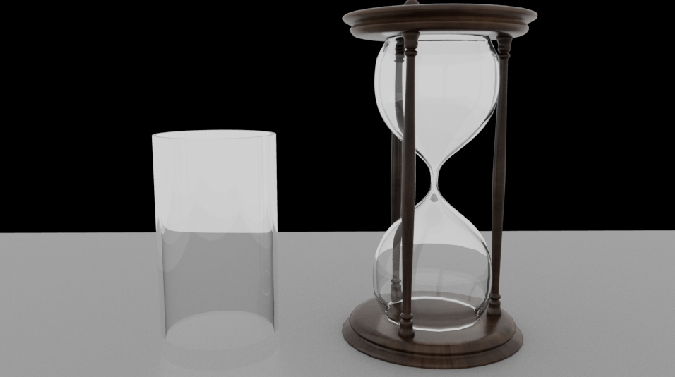
Just like metal in Arnold, giving your glass something for it to reflect can change its look drastically. Using an HDRI. and a good one at that, it very important to making glass look good and visible in the render.
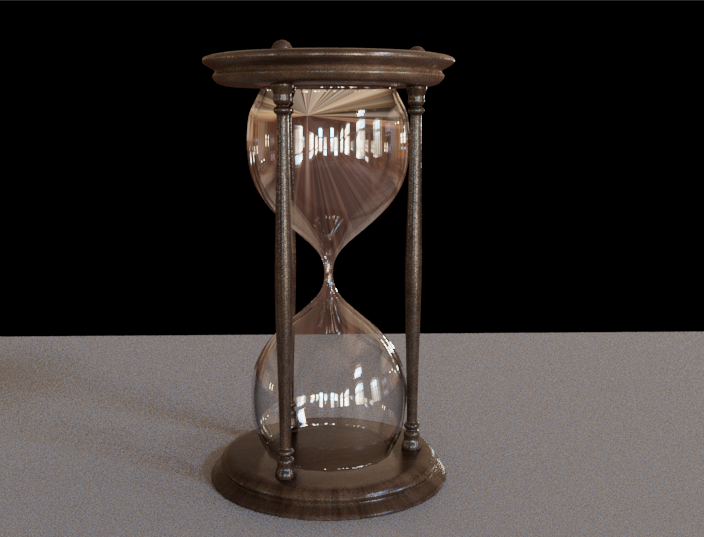
No HDRI:
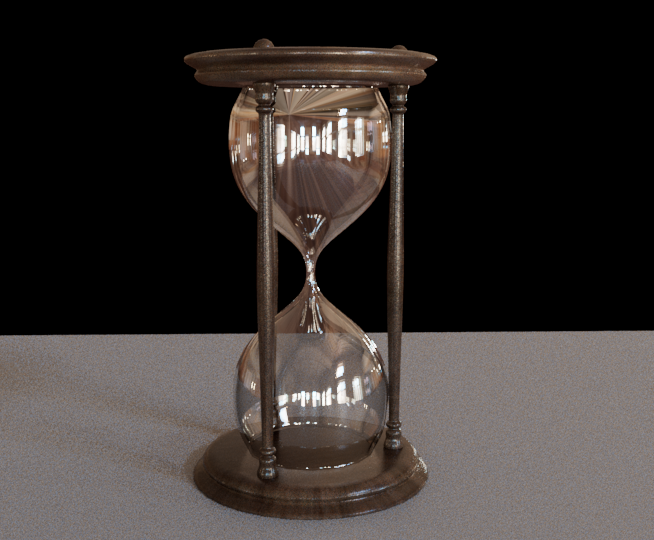
With HDRI:
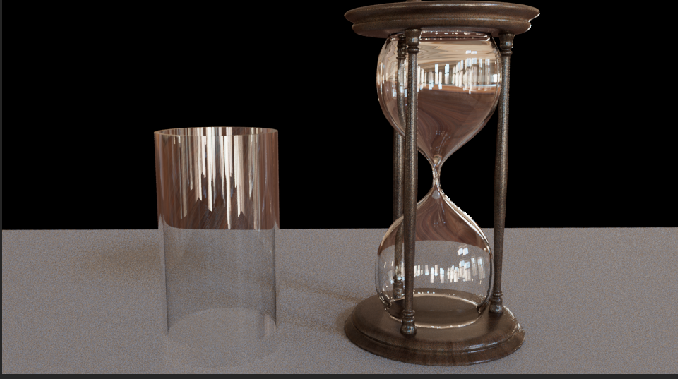
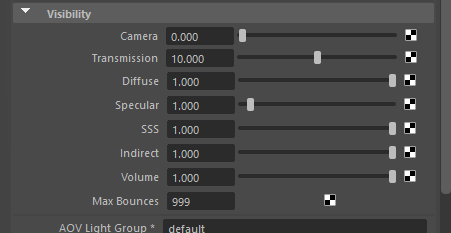
You can also adjust how an HDRI reacts with your object/how much it appears in the reflections through the HDRI visibility settings. This allows you to make these adjustments WITHOUT having to change the intensity of your HDRI/the lighting of your scene.
Thin Walled
Thin walled is a really important setting depending on your model and what you want the object to look like. If you have a solid model, you can turn this setting on to make it look like the object is hollow and has walls, even if that is not true of the model. This setting is unnecessary if your geometry is already modeled to have walls/hollowness!

From Arnold Documentation: “In the thin walled mode, the surface is considered to be a (microscopically) thin two-dimensional sheet of material, rather than the boundary of a solid object. This is intended for the convenient and efficient rendering of thin materials (such as window panes, soap bubbles, sheets of paper and leaves) as open meshes rather than closed thick shells.”
This is best seen in the example below. If thin walled is turned off, then the sphere looks like a water droplet. If thin walled is turned on, then the sphere looks like a hollow bubble instead.

Glass IOR
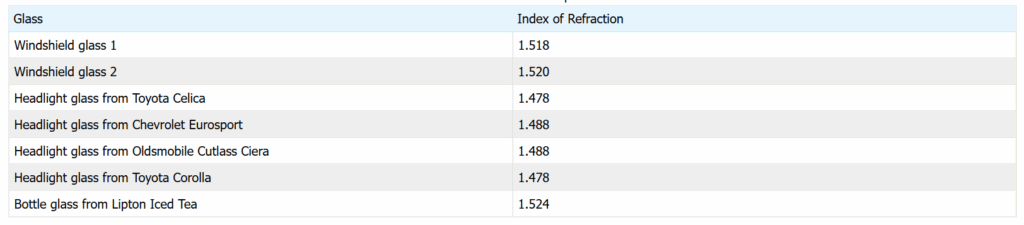
The standard rule is that glass has an IOR of 1.4 – 1.7. The IOR effects how strong the reflections are in your glass. Here’s a great chart to reference when determining what IOR you need for your glass:

Roughness
The general rule is to not leave the roughness setting at just 0 because it will make the glass look crystal clear and perfect. If it has been ever used before, it will have some roughness. This is where you add any fingerprint/smudge roughness maps. Be aware that if you go too far with the roughness it will appear like frosted glass.
Roughness set to 0:
Roughness set to .1:
Roughness set to .3:
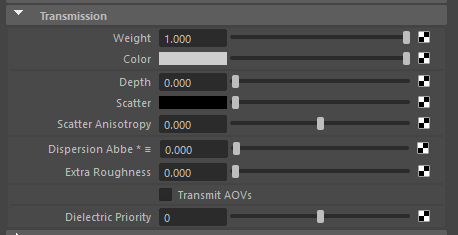
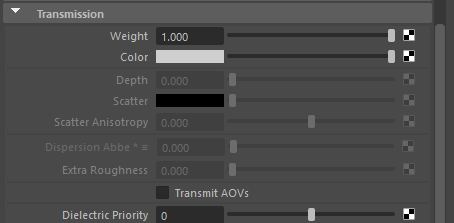
Transmission Settings
Most of your manipulation should be in the transmission settings for glass. Here’s a quick guide to the settings so you can understand them:
- Weight: how see through the object is, set to 1 for glass.
- Color: where you can add a color to your glass (don’t use base color, use transmission color for adding a color to your glass)
- Depth: determines how thick your glass looks and how deep the color passes through the object. World space is import for this parameter.
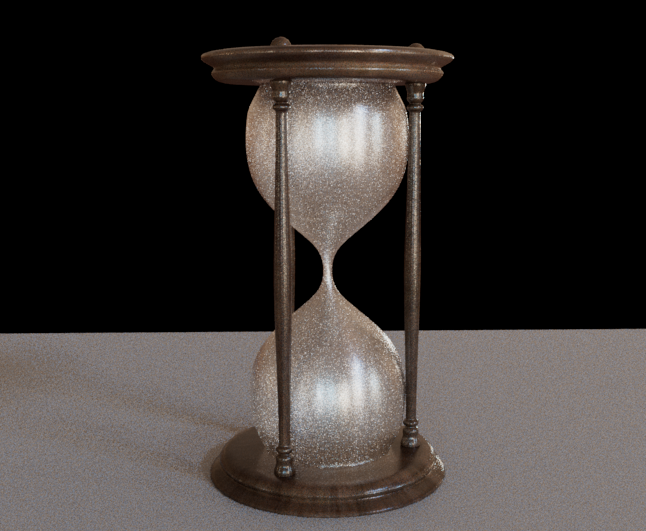
- Scatter: black at default, only change if you want the glass to look thick or milky. Can also add smudge texture maps to this part of the shader.
- Scatter Anisotropy: manipulates if the light on the object scatters evenly or leans towards the light.
- Dispersion Abbe: can manipulate to get visible color bands in the refraction. Useful for gemstones such as diamonds.
- Extra Roughness: another way to add roughness to the material. More specific to transmission. Can add texture maps here as well.
- Dielectric property: to manipulate when you have intersecting transparent objects like water in a glass.
Note: If you’re using thin walled, these settings are going to be disabled as the thin film is setting them for you:
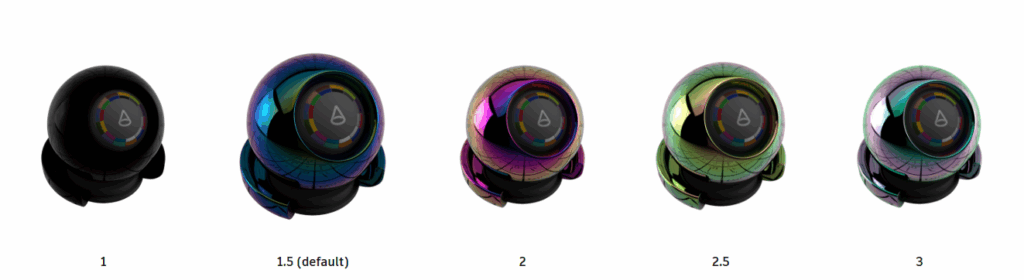
Thin Film
Not to be confused with thin walled. This is a setting for creating an iridescent film on the glass. Really most useful for things like bubbles. It can also create a mirror like film on your glass.
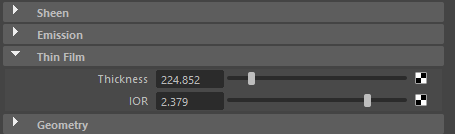
Here’s a guide to the thickness parameter form the Autodesk website:

And a guide to the IOR parameter for thins film as well:
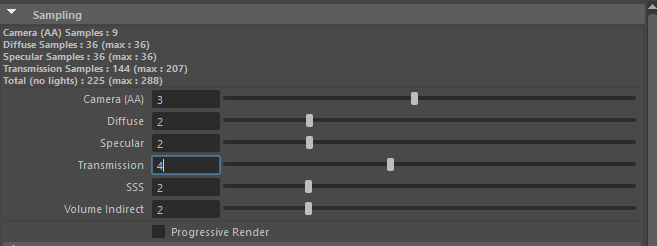
Rendering Glass
Just like with other shaders in Arnold, upping render samples for a will create a crisper image with a longer render time. If you’re seeing noise in only your glass but not the rest of your render, make sure to adjust transmission samples, specifically, to fix the problem. Remember, the higher the number, the higher the render time.
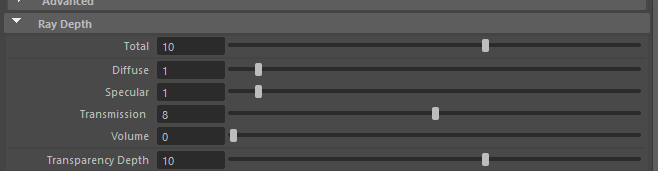
Another render setting you can adjust to make your glass look better is the Ray Depth. It essentially dictates how many times light can reflect or refract off of surfaces before being absorbed or exiting the scene. Transmission Ray Depth controls the number of bounces for transparent objects like glass. The biggest use for this is getting rid of any dark blobs you see in your glass. Just like increased samples, increased ray depths increase render times.
Article Sources:
Analytical Sciences Digital Library. 2016. “Typical Results for Refractive Index Determination of Glass.” Chemistry LibreTexts. November 11, 2016. https://chem.libretexts.org/Ancillary_Materials/Laboratory_Experiments/Wet_Lab_Experiments/Analytical_Chemistry_Labs/ASDL_Labware/Forensic_Science_Laboratory/Glass/Typical_Results_for_Refractive_Index_Determination_of_Glass.
“Help.” 2025. Autodesk.com. 2025. https://help.autodesk.com/view/ARNOL/ENU/?guid=arnold_user_guide_ac_shading_ac_surface_shaders_html.