Setting Up a Dual Boot to Linux and Windows
I’m sure that we’ve all heard several times from our professors about the importance of learning Linux now so that we can be prepared for the professional world. Just like learning any new piece of software, it is never easy the first time you use it, which is why it is important to start now. That’s the beauty of school; we can make mistakes with little consequence. This guide will teach you how to install Linux on a computer with Windows already installed and to set it up in a way where you can choose which operating system you would like to use when you start the computer.
Step 1: Choose which Linux distribution you’d like to use
Unlike Mac and Windows, Linux comes in many shapes and forms. I would recommend spending time researching which distribution you feel would be best for you. My advice for your research would be to find a distribution that is well supported by the community and receives frequent updates, but as a beginner, it would be best to go with one that is early to early. Ubuntu would most likely be the best option since it has a large community and is relatively easy to use. This guide will be assuming you chose Ubuntu.
You will also need a partitioned flash drive. I recommend buying a cheap 8GB thumb drive; this will do the job.
Ubuntu download: https://ubuntu.com/download
Step 2: Download Etcher
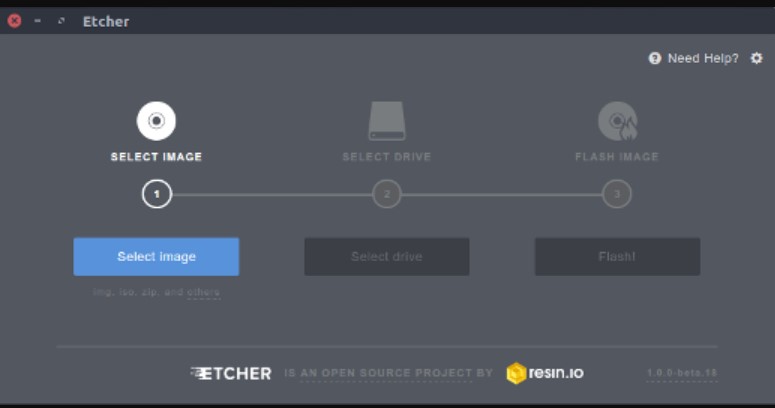
After downloading your chosen Linux distribution, you will need to download software that will turn the flash drive into a bootable drive. This means that when you restart your computer and press the key to get into your bios screen, you will be able to boot to that drive.
Once you have downloaded Etcher, select “Select image” and select the Ubuntu file. Then you press “Select Drive” and select the portable thumb drive. Next, click “Flash!” and wait for Etcher to do its thing.
*Important note:
Before starting the installation process, there are a few things to consider. When you install an Operating system on a computer, it will ask which hard drive you would like to install it on. Since we are installing on a computer that already has Windows, 100% of the storage space is taken up by Windows. The method \I am showing you assumes that you will install Ubuntu on the same hard drive that Windows is on. This means that you will need to choose how much of the storage space you will give up for Ubuntu. Let’s say that you have a 500GB hard drive; you could choose to allocate 250GB for Ubuntu but what that means is that you will only have 250gb of useable space for Windows. During the installation process, there will be a little slider that you can use to adjust how much space you would like to give to Ubuntu.
Step 3: Install Ubuntu
Next, you will restart your computer, and while it is booting up, you will press the spam button you use to get into your bios screen. For most computers, it is F12, but on mine, it is F2. If those don’t work, try some of the other F keys. If you don’t get it in time, restart your computer and try again.
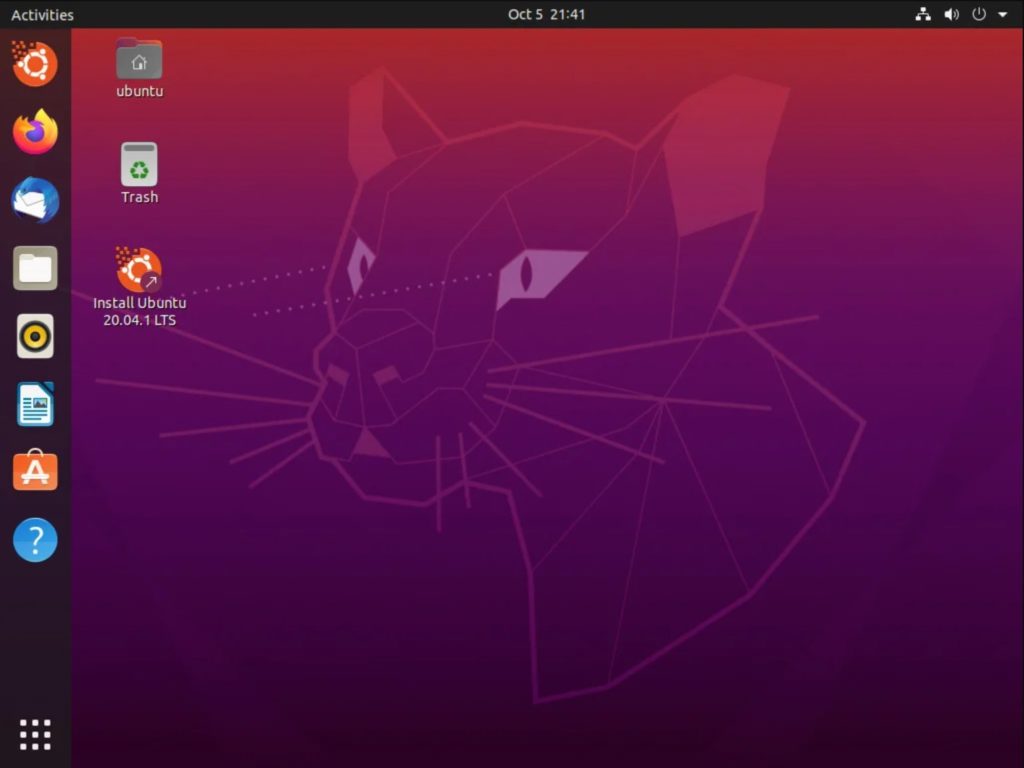
Once you are in Bios, you will select the boot menu and select Ubuntu to boot into it. Then you will follow the installation menu. Before you install, I would recommend to press the “Try Ubuntu” option, which will let you play around in Ubuntu for a bit which is important so you can see if everything is working properly.
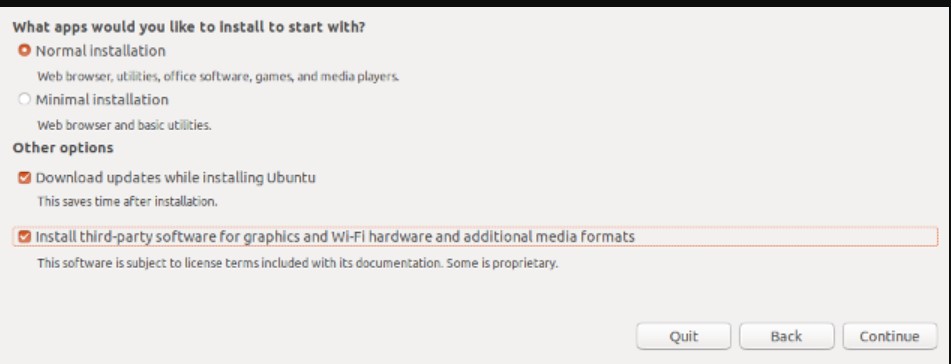
After pressing the “Install Ubuntu” icon on the desktop screen, you will start the installation process. You will see a screen asking for apps to install, and you will want to check the boxes for “Normal installation”, “Download updates while installing Ubuntu”, and “Install third-party software for graphics and Wi-Fi hardware and additional media formats”.
The next screen is very important. There will be 3 options for you to choose and it will depend on what you would like to do with Linux. For example, If you would like to download it alongside Windows and dual-boot between the two like we are doing in this tutorial, you will select “Install Ubuntu alongside Windows 11”.
If you would like to get rid of Windows completely and only have Linux on your computer, you will select “Erase disk and install Ubuntu” but remember this will erase everything that is on that disk, and you will start from square one.
The third option labeled “Something else” will allow you to create a partition on a separate hard drive, but since we are using the one drive, you will select the first option, “Install Ubuntu alongside Windows 11”.
The screen that will appear next is a slider that will determine how much hard drive space you will give to Ubuntu. Click and drag the slider in the middle to determine how much hard drive space you would like to give to Ubuntu.

It will then ask for your location and information about the computer, such as your name. Next, It will ask you to create a username and a password. This password will be the one you will use to log in to your computer.
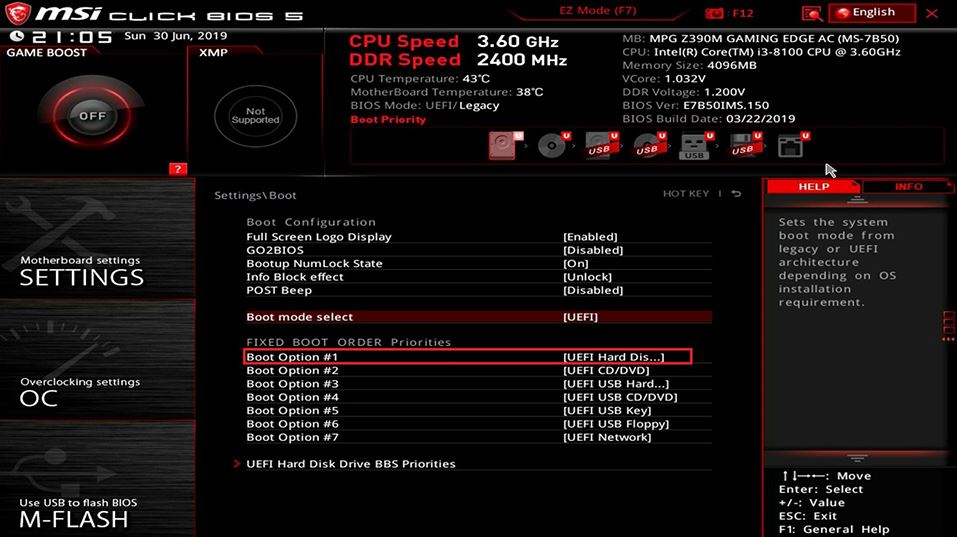
Step 4: Restart Your Computer
After starting your computer, use the arrow keys to select which OS you would like to boot into. If you don’t see the screen below when you boot up your computer, this means that your boot priority is to Windows. To fix this, you will need to go back into your bios settings and switch the boot priority from Windows to Ubuntu.
Conclusion
Once you are in Ubuntu I would recommend checking to see if there are any other things that need to be installed. Ubuntu has a built in store that’ll let you download some basic applications such as Slack, Discord, and Spotify. Also downloading applications takes a few extra steps to install and set up using the terminal. If you have any trouble getting started I would recommend consulting the Ubuntu help page or searching through YouTube for ways to help install programs.