Render Farm Guide: Maya
To those who might not be familiar, the Render Farm here at SCAD is gods gift to us artists. I don’t even know where we would be without it around finals time when we all have massive projects that need to be rendered. But in case you’ve never used the Render Farm or aren’t sure what it is I will explain.
We’ve all dealt with the horrors of rendering out our image sequences with render times nearing 40-50 minutes. If you’re dealing with render times that long for just image, imagine doing that but for 200 frames. You’d be sitting at you’re computer all day waiting for it to finish and there’s the chance that it missed a few frames or your computer shut off in the middle of the night which has happened to me before. Now imagine instead of using one computer to render 200 frames you could render 1 frame using 200 computers. That would dramatically reduce render time which is essentially what the Render Farm does.
It might seem a little confusing at first but once you have completed your first render using the farm it’ll become instinct to you. But if you are having trouble using the farm or this is your first time, I have created a step by step guide that should help you navigate using the Render farm for Maya Arnold.
Step 1: Create Project Folder
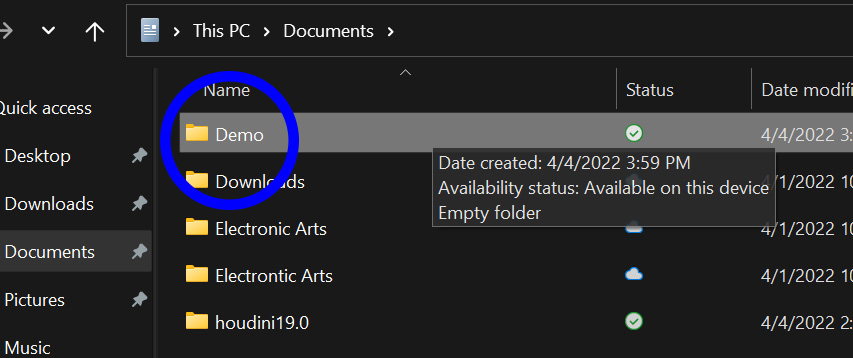
First step is to create the folder which your Maya file and all texture will be in. Make sure that the name of folder doesn’t contain spaces or asterisk
Step 2: Create Two Folders
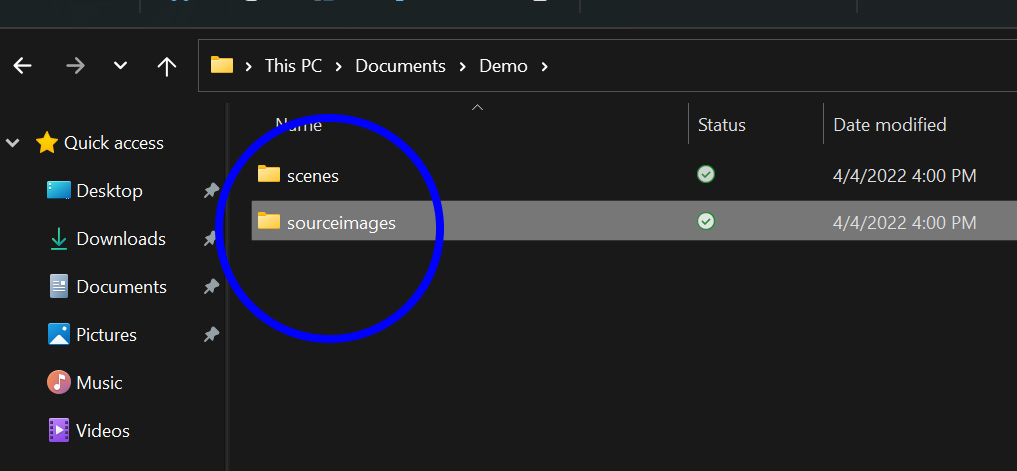
Create two folders for your project with one named “scenes” and the other “sourceimages” typed just that way with no spaces. Your Maya file will go into the scenes folder and the textures will go into the sourceimages folder.
Step 3: Set Project
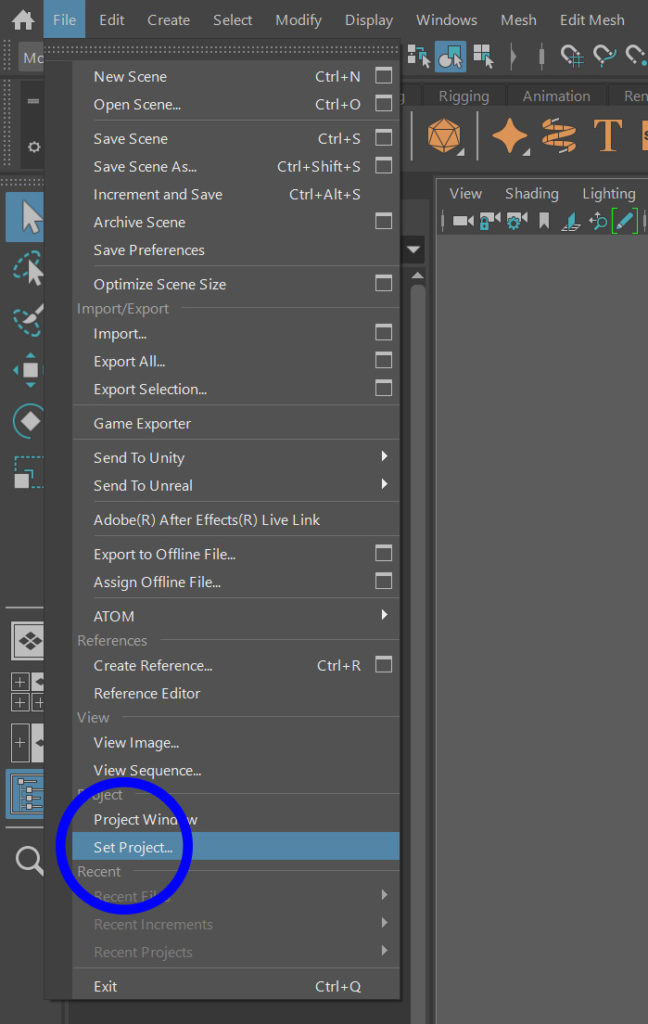
Open your Maya file that is now in the scenes folder and press file/Set Project/Project Folder. One important note is to set the project to the main folder and not the scenes folder where the Maya file is.
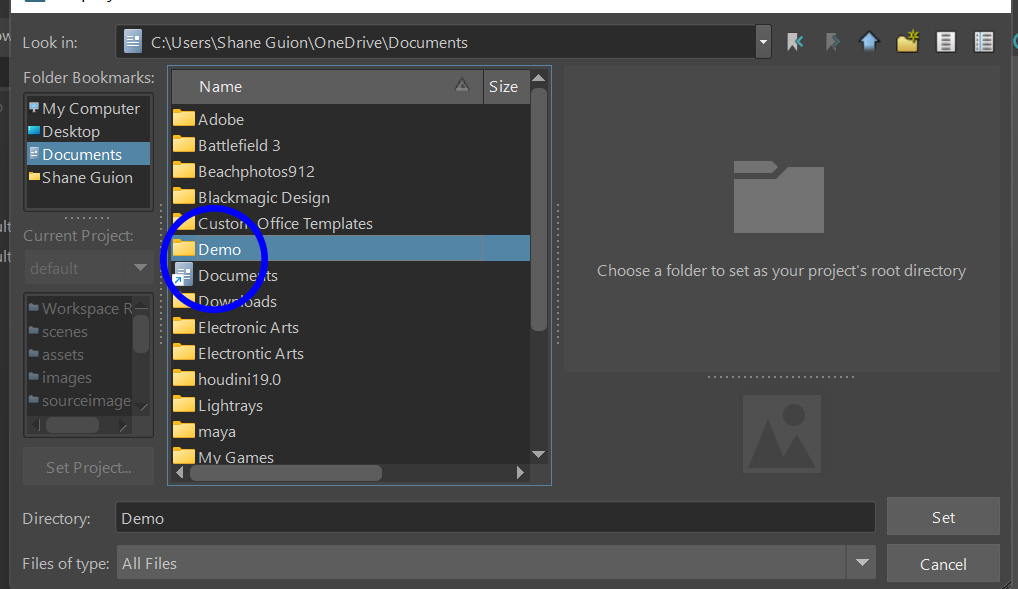
When you set the project there will be a pop that tells you there is no workspace set up in the folder. Click “Create Default Workspace”.
Step 4: Check Frames Setting
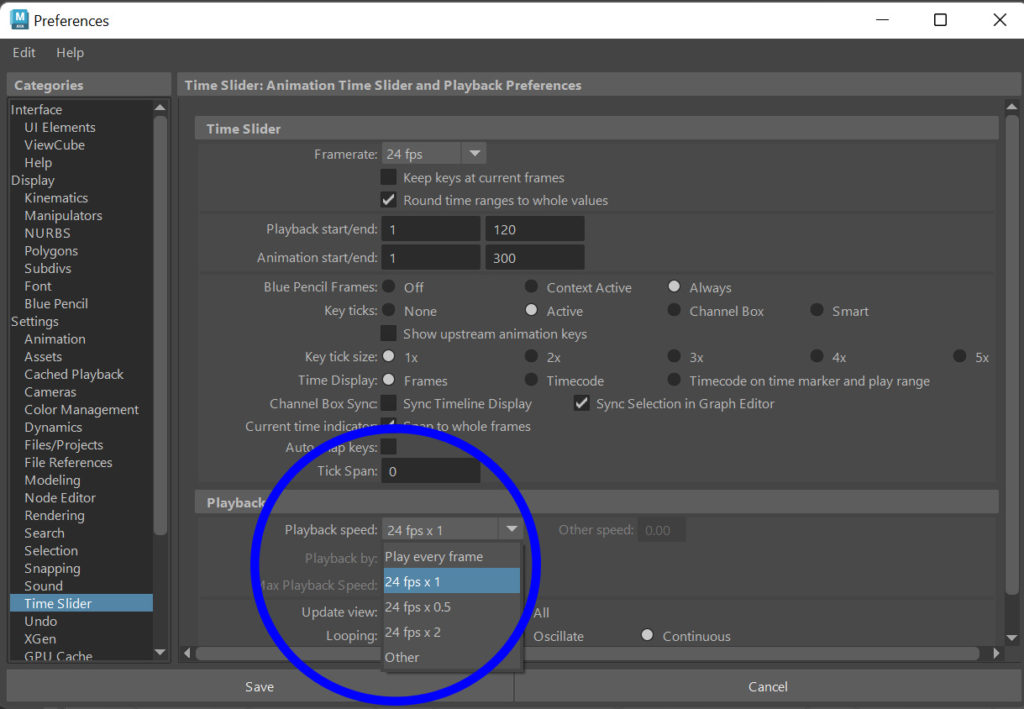
The rest of the steps are very similar to how you would set up your render sequence as if you were rendering it on your personal computer. Be sure to check to make sure that you have the correct playback speed for the animation slider.
Step 5: Render Settings
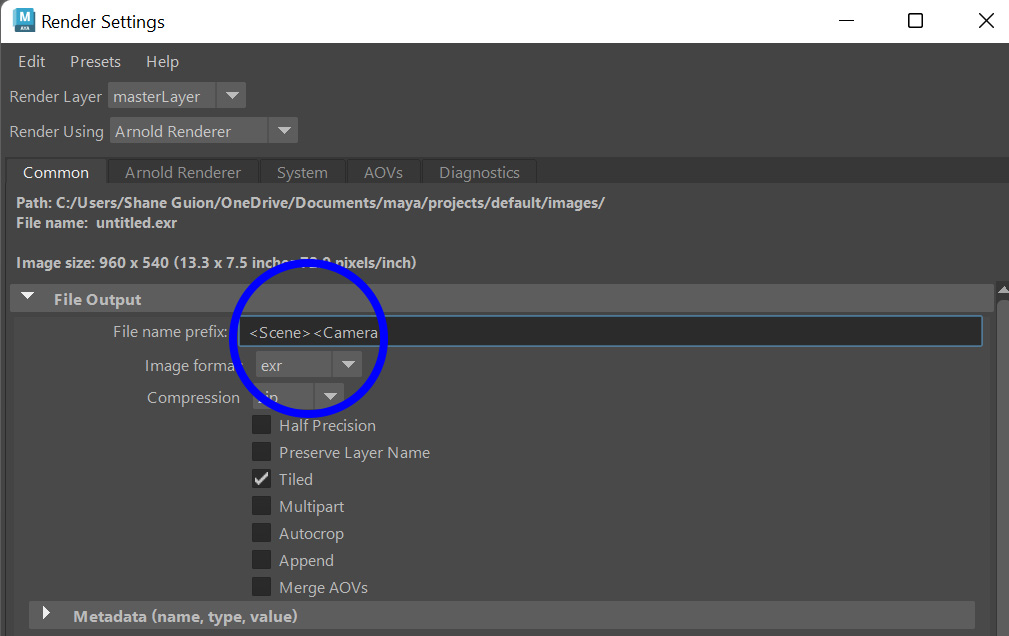
While not crucial, make sure have the file name prefix selected as this will be the output name for each file. I like have the scene name and camera with an exr file format.
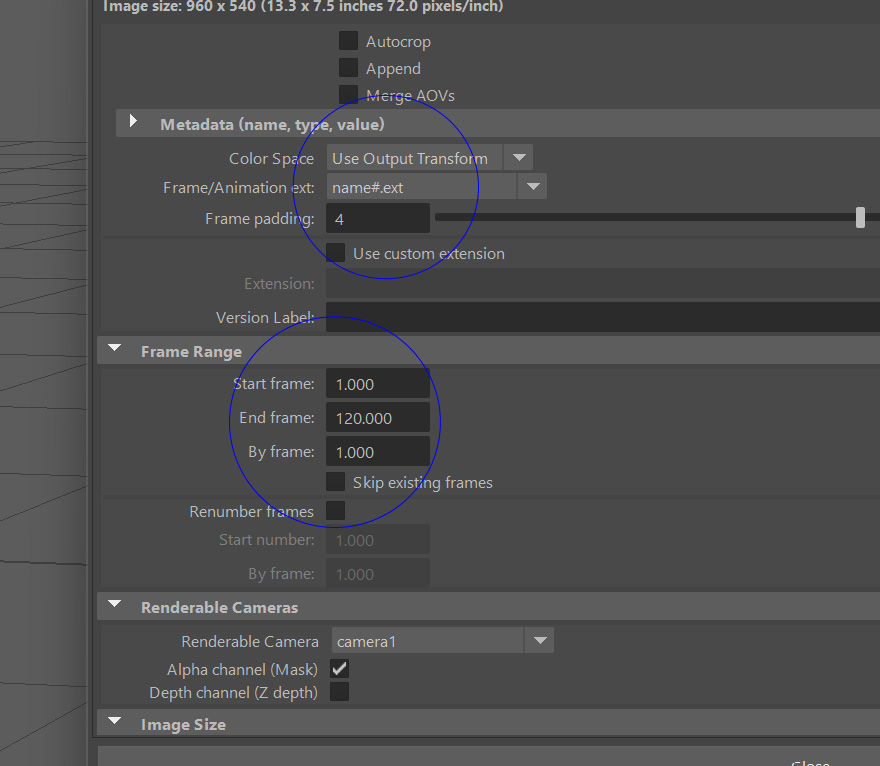
Next is to change that meta data and the frame range for the scene. Change the meta data information for frame/animation ext to “name#.ext”. This will give the file a name, number, and file type. You’ll notice that once you change this information the frame range section will no longer be greyed out. After changing this information, enter in the desired frame range for the scene. If you are trying to render the entire scene, have the starting frame at 1 and the end frame to the last frame number in the scene.
Step 6: Upload to the farm
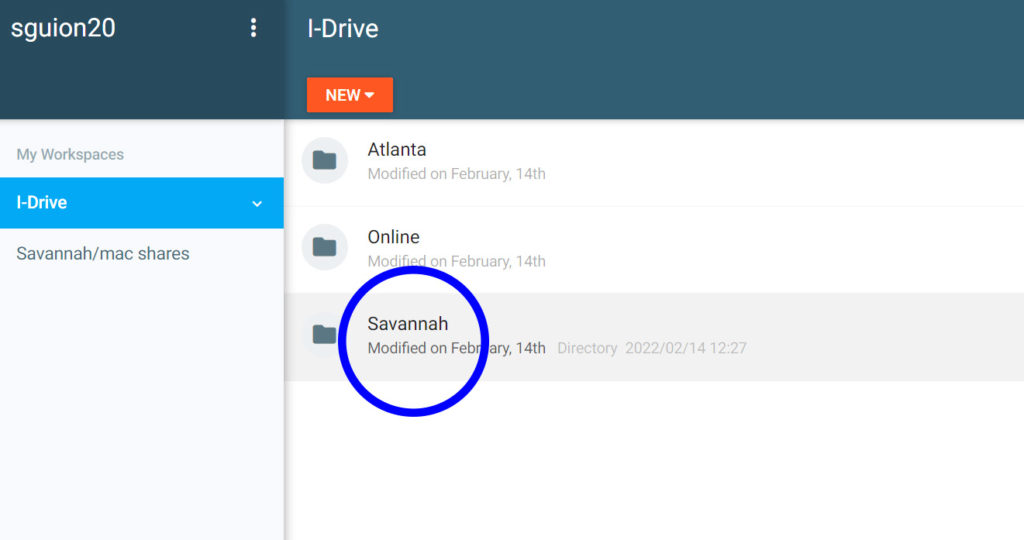
There are two ways to upload your scene to the render farm. The first is through my-file and the other is through filezilla. The filezilla tutorial is available on our website at the resource tab. For now, this tutorial will follow the my-file approach. First you will visit https://sav-myfile.scad.edu/ and enter your SCAD credentials. Next you will click on the Savannah section.
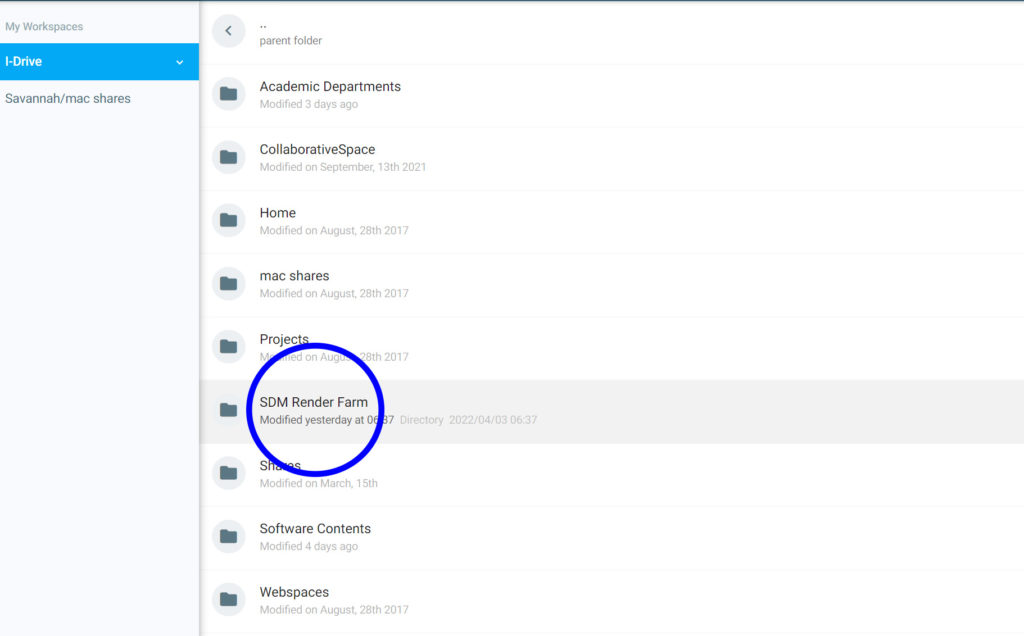
Next you will click on the “SDM Render Farm” section.
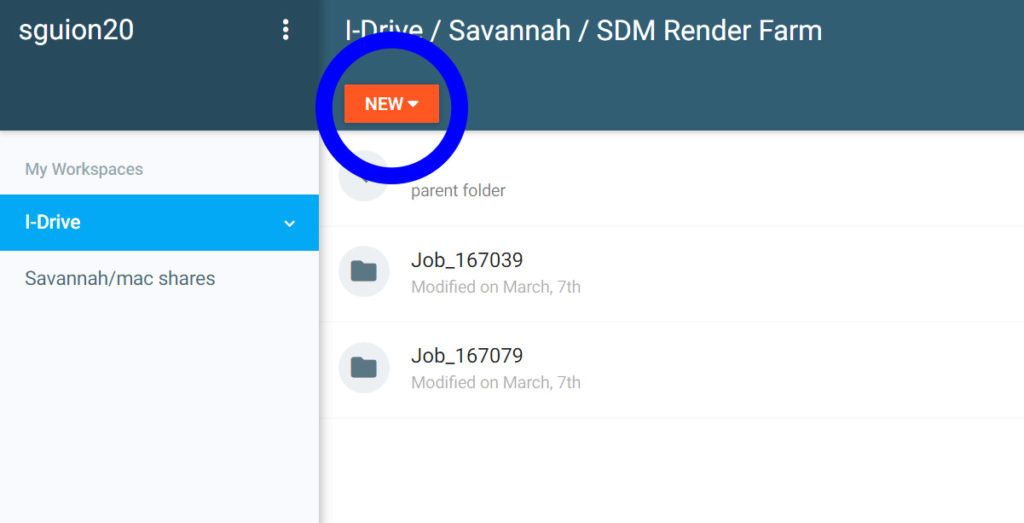
Once you have entered this section, click “new” and “upload” then upload the folder containing the scenes and source images folder.
Step 7: Submit project
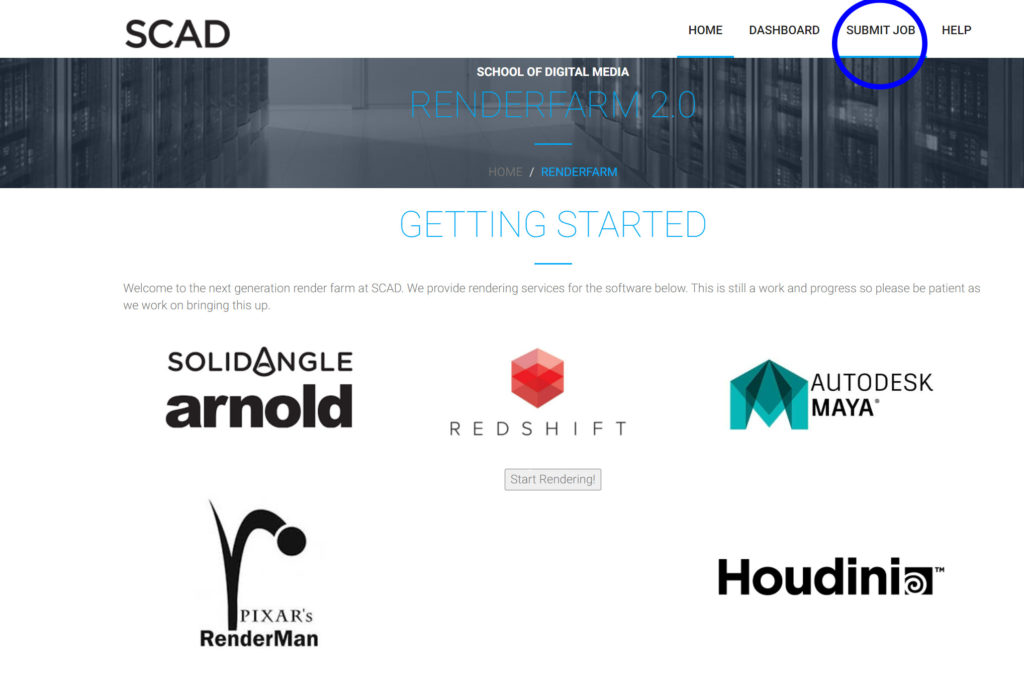
Next you will visit the render farm website at http://render.scad.edu/. You can also find the link to the website at https://sdm.scad.edu/intranet/student/. Click the “Submit Job” button. And then press the drop down button and select the file name for your project. Then type in the frame range for project and which render engine the project is in. Then submit the project and wait for the project to finish rendering. Click the “Dashboard” button to see the progress for the project as well as seeing your Job id number. Once the project is finished rendering, go back to my-file where you uploaded the project and you’ll find the folder with the job id number matching the one from the dashboard.
If there are any issues with the render farm or my-file don’t hesitate to submit a ticket.